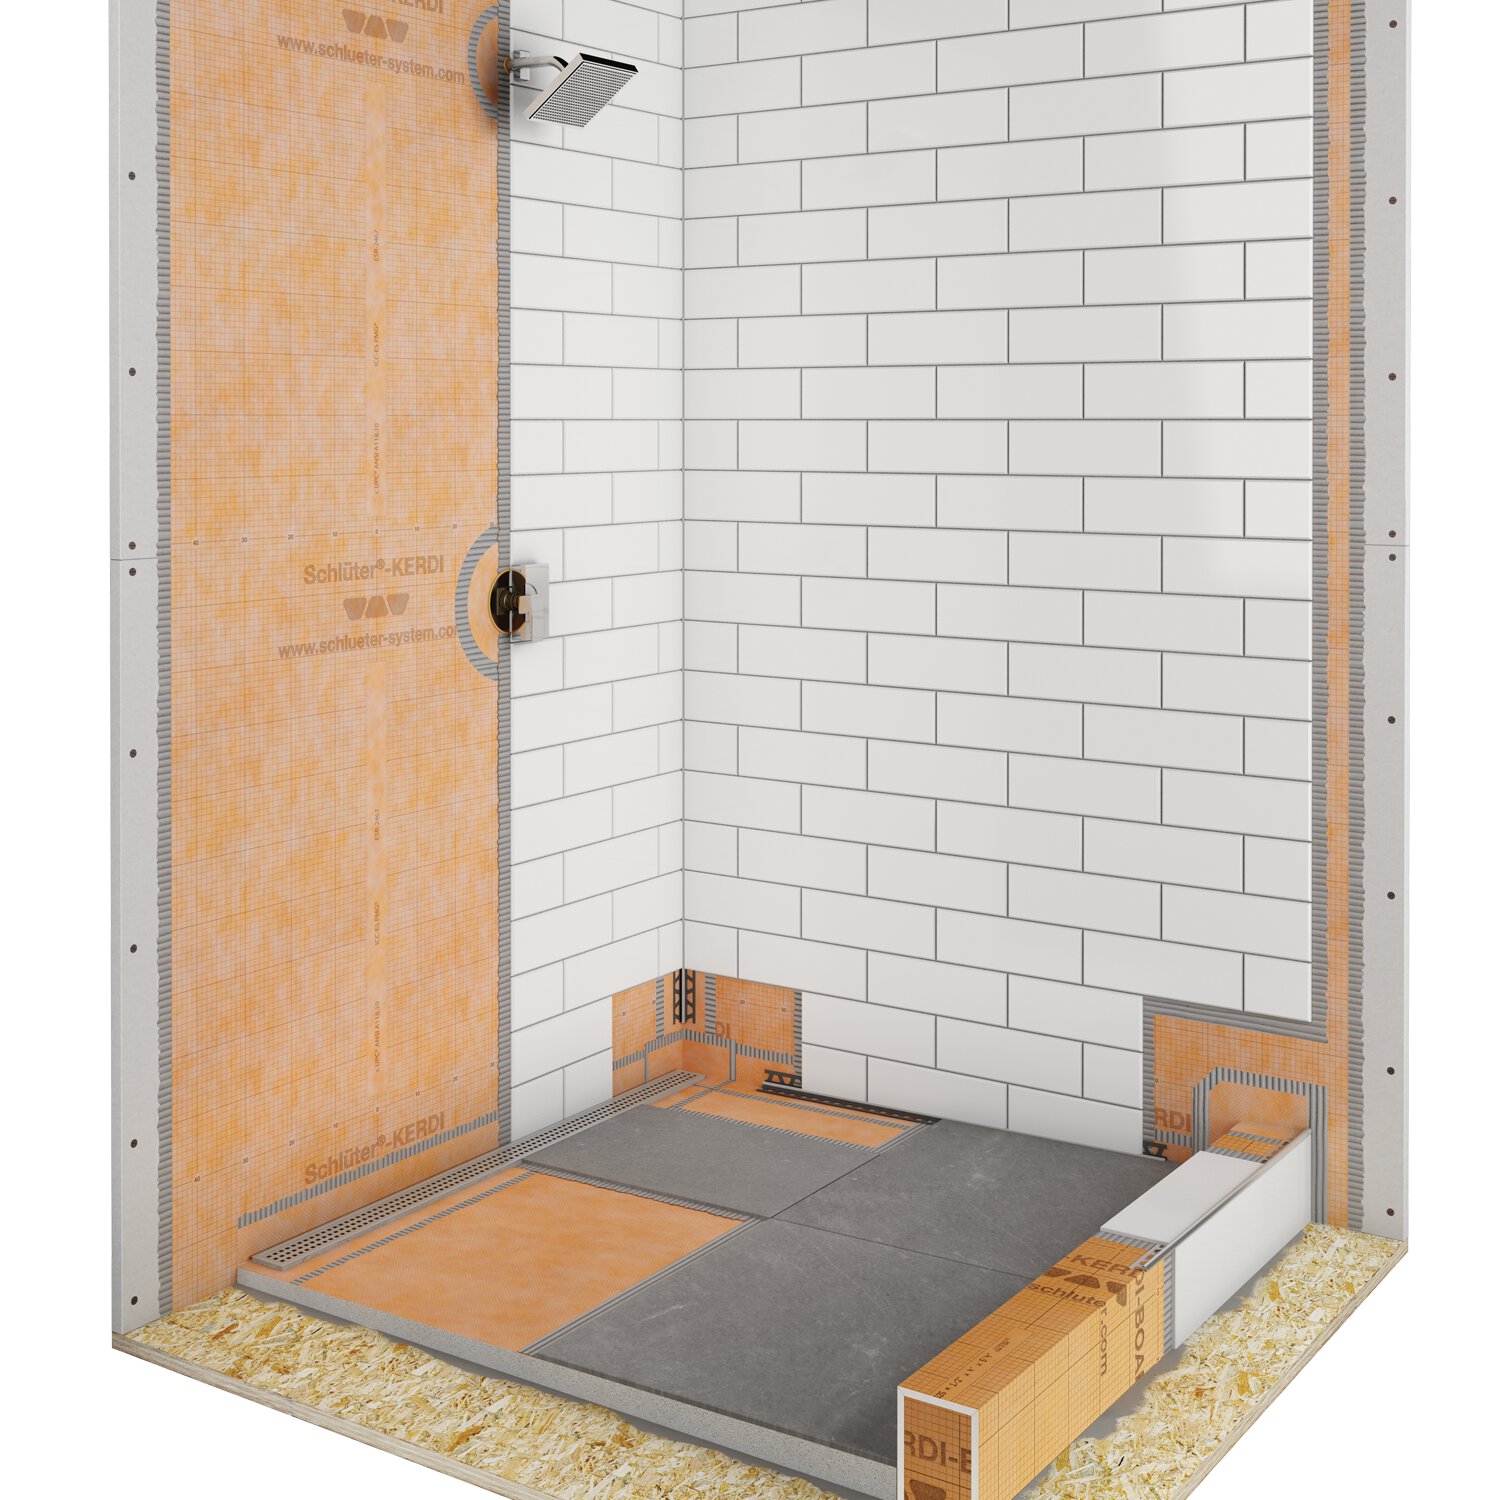
When you're remodeling a bathroom in Decorah, Iowa, tile selection and vanity styles usually steal the spotlight. Beneath those finishes, however, moisture management dictates whether your investment lasts for decades or fails within a few years. Traditional mud-beds and basic cement backer boards often let water seep through grout lines, leading to hidden mold, rotted wood subfloors, and expensive structural repairs.
Understanding how modern moisture barriers work changes how you plan a wet room or shower installation. Instead of relying on old-school patchwork methods, contractors and homeowners use integrated systems like the Schluter-Balik approach to create continuous waterproof envelopes. This guide breaks down how these concealed assemblies operate, how proper installation prevents common failures, and what you need to know before starting a bathroom upgrade in northeast Iowa.
Understanding the Schluter Approach to Waterproofing
Traditional shower construction treats tile and grout as the primary waterproof barrier. In reality, grout is porous, and water inevitably migrates beneath the surface. Modern waterproofing flips this script by placing an impermeable membrane directly behind the tile layer, capturing moisture and directing it straight into the drain.
The core of this methodology relies on polyethylene sheets or bonded membranes that attach to walls and floors using modified thinset mortar. When installed correctly, the membrane forms a seamless skin over the entire wet area.
- Complete Enclosure: Walls, curbs, niches, and floors are wrapped in a continuous layer.
- Vapor Retardance: Low water vapor permeance prevents moisture from traveling into framing cavities.
- Crack Bridging: High-performance membranes accommodate minor substrate movement without tearing or losing adhesion.
For homes in Decorah, where seasonal humidity swings from humid summers to sub-zero winters can stress building materials, managing vapor transmission is essential for preventing structural degradation. You can learn more about official manufacturer specifications and technical data sheets directly on the Schluter Systems Website.
Substrate Preparation and Surface Requirements
No waterproofing membrane can compensate for a weak or uneven base. Before any installation begins, contractors must inspect and prepare the underlying structure. Whether you're working with plywood subfloors, concrete slabs, or wood stud walls, the surface must be clean, stable, and plumb.
Key Preparation Steps
- Clear Debris: Sweep away all dust, loose mortar, grease, and old adhesive residues.
- Check for Deflection: Floors must meet strict deflection criteria (typically L/360 or greater) to prevent tile cracking.
- Prime and Level: Apply appropriate self-leveling compounds or mortar beds to correct dips and establish correct drainage slopes toward the drain assembly.
Skipping these steps leads to air pockets beneath the membrane, which compromises bonding strength and can cause the tile above to sound hollow or crack under foot traffic.
Managing Slopes and Drainage in Iowa Homes
Water must move. If a shower floor holds standing water, minerals deposit in the grout lines, soap scum builds up rapidly, and the risk of moisture breaching the membrane increases over time.
The Schluter system utilizes sloped trays or custom mortar beds designed to maintain a strict minimum slope of one-quarter inch per foot toward the drain. When paired with linear drains or traditional point drains, this ensures rapid evacuation. In older Decorah homes—where settling foundations often create uneven room geometries—installers must check measurements multiple times during the pre-slope phase to avoid pooling near thresholds or glass doors.
Official building standards and local code requirements for residential plumbing and moisture protection can be cross-referenced through the International Code Council resources.
Step-by-Step Installation Workflow
Executing a durable waterproof assembly requires patience and strict adherence to manufacturer guidelines. Cutting corners on seams or pipe penetrations destroys the integrity of the entire system.
- Apply Thinset: Use an unmodified or thin-set mortar appropriate for bonding fleece-webbed membranes to the substrate, combing it out with a notched trowel.
- Embed the Membrane: Press the membrane into the wet mortar using a float or drywall knife to eliminate air bubbles and ensure full contact.
- Seal Seams and Corners: Overlap adjacent membrane sheets by at least two inches, sealing all joints with waterproof sealing band and thinset.
- Detail Penetrations: Use pre-formed inside and outside corners, pipe seals, and mixing valve gaskets wherever plumbing fixtures pierce the membrane.
Once the membrane cures—usually within 24 hours—perform a flood test by plugging the drain and filling the shower pan with water for 24 hours to verify there are no leaks before laying any tile.
Common Waterproofing Mistakes to Avoid
Even experienced DIYers and general handymen occasionally make critical errors when installing bonded waterproof membranes. Knowing what to watch out for saves you from costly tear-outs down the road.
- Using the Wrong Mortar: Always use the specific type of thinset recommended by the membrane manufacturer. Using pre-mixed bucket mastic under waterproof sheets prevents proper drying and bonding.
- Inadequate Overlaps: Skimping on seam overlaps leaves microscopic gaps where steam and water vapor can infiltrate framing.
- Ignoring Valve Cutouts: Forgetting to seal around shower mixing valves is one of the most frequent causes of behind-the-wall leaks. Always apply specialized pipe gaskets or waterproofing sealant around all plumbing penetrations.
- Rushing the Cure Time: Tiling over uncured mortar or failing to let the flood test complete can compromise the entire assembly.
Frequently Asked Questions
Can I install Schluter waterproofing over old tile?
No. To achieve a reliable bond, membranes must be applied directly to clean, stable structural substrates like drywall, cement backer board, or concrete. Old tile and paint must be completely removed.
How long does the waterproof membrane need to cure before tiling?
Most manufacturers permit tiling immediately after the membrane is firmly embedded and seams are sealed, provided the thinset underneath has had initial set time. However, waiting 24 hours is standard practice to ensure maximum bond strength.
Is a waterproof membrane the same as a vapor barrier?
Not always, but high-density polyethylene membranes used in modern shower systems function as excellent vapor retarders, significantly reducing moisture migration into exterior walls during winter months.
Do I still need cement board if I use a waterproof membrane?
It depends on the specific product assembly. Some membranes can be applied directly over standard drywall or specialized building panels, while others require a rigid substrate like cement backer board or foam building panels. Always follow the manufacturer's technical manual for your specific assembly type.



