Google Docs isn't just for text documents. You can create custom illustrations, flowcharts, and diagrams right inside your page using the built-in drawing canvas. Whether you need a quick sketch or a structured organizational chart, you don't need external graphic design software to get it done.
To open the drawing tool, click Insert in the top menu bar, select Drawing, and then click New. This opens a blank workspace equipped with shapes, lines, text boxes, and scribbling tools. When you click Save and Close, your creation drops directly into your document as an image.
Accessing the Google Docs Drawing Tool
Finding the drawing canvas takes only a few seconds, but knowing where it lives saves you time when formatting documents.
- Open any document in Google Docs.
- Place your cursor where you want the drawing to appear.
- Click the Insert menu at the top of the screen.
- Hover over Drawing and select New.
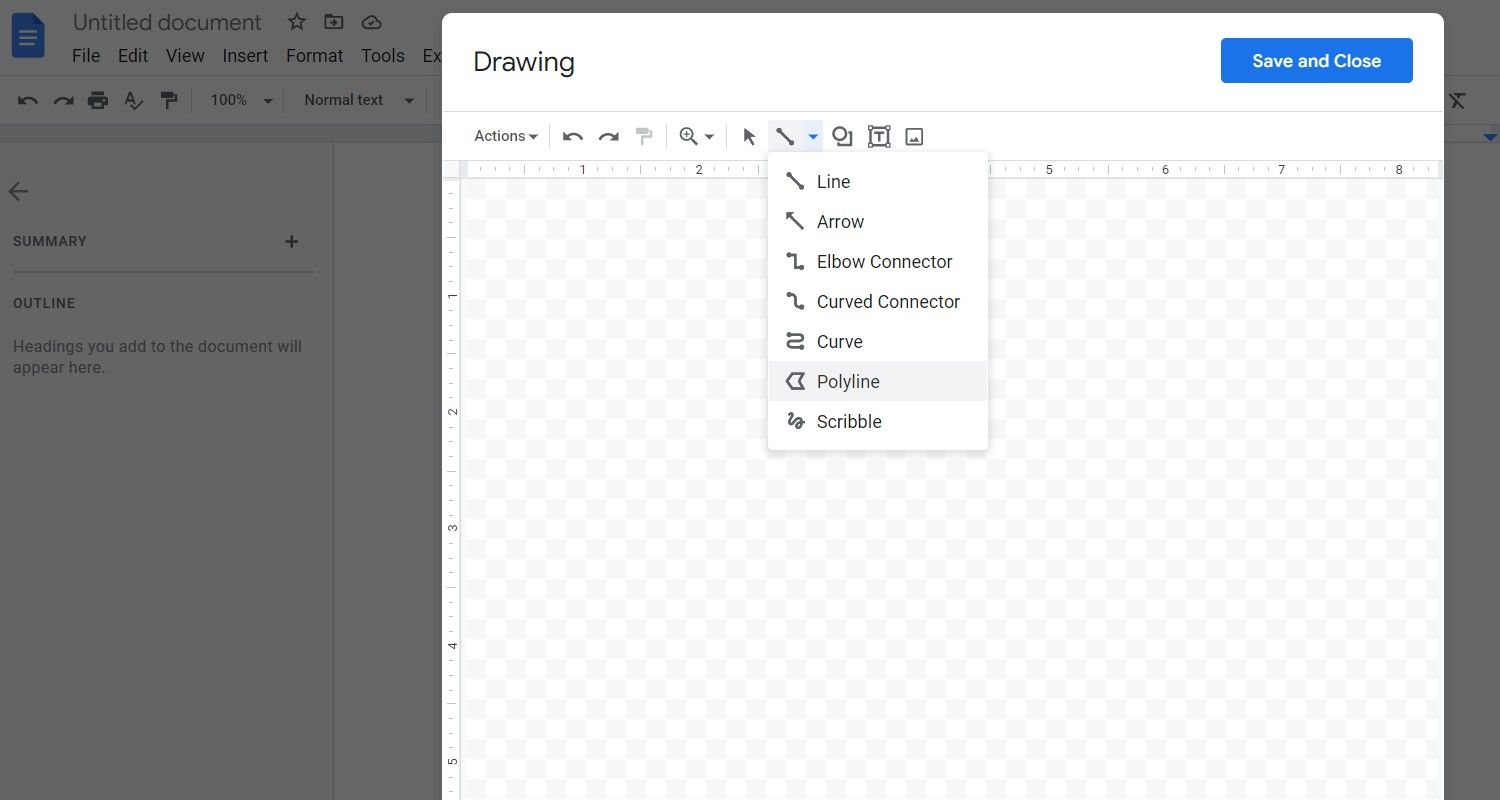
A modal window will pop up over your document. This is your dedicated drawing workspace. It features a transparent grid background, a toolbar across the top, and buttons for saving or discarding your work. If you ever need to edit your drawing later, just click on it inside your document and select the Edit button that appears beneath it. To understand the complete picture, we recommend the detailed article by The New York Times.
Using Drawing Tools and Shapes
The drawing toolbar gives you a handful of core design features. You don't need artistic mastery to build clean, professional elements.
- Shapes: Click the shape icon (a circle overlapping a square) to choose from a large library of rectangles, arrows, callouts, and equation symbols. Drag your cursor across the canvas to draw your shape.
- Lines: The line tool includes options for straight lines, arrows, elbows, curves, and freehand scribbles. Elbow connectors are especially helpful when you're building diagrams because they snap to shape attachment points.
- Text Boxes: Click the "T" icon to add text inside or outside your shapes. You can change font sizes, colors, and alignments just like you would in a regular document.
- Formatting: Use the fill color, border color, and border weight buttons to style your elements. Consistency goes a long way when you're making diagrams look professional.
Creating Flowcharts and Diagrams
Flowcharts require precision, alignment, and clear direction. Building them inside the drawing canvas is straightforward if you follow a deliberate process.
Start by placing your primary shapes on the canvas. As you drag shapes around, red alignment guides will appear automatically, helping you center elements and space them evenly relative to other objects.
Next, connect your shapes using the line or elbow connector tools. When you hover over a shape, purple dots appear on its borders. Drag a line from one dot to another to lock the connection in place. If you move the shape later, the line stays attached, which prevents your flowchart from breaking when you adjust layouts.
Add concise text inside each shape to explain the step or decision point. Group related elements together by selecting multiple objects—hold down the Shift key while clicking—and right-clicking to choose Group. This lets you move entire sections of your diagram at once without misaligning individual pieces.
Freehand Drawing and Scribbling
If you prefer sketching by hand or want to highlight specific areas with a digital pen, the freehand tool is your best option.
- Click the line tool dropdown menu in the toolbar.
- Select Scribble from the bottom of the list.
- Click and drag your mouse or trackpad to draw custom lines and shapes.
- Release the mouse button to finish the stroke.
Scribbles behave like any other object on the canvas. You can change their color, resize them, or rotate them after you've drawn them. While mouse drawing can feel jittery, it's useful for quick annotations, signatures, or pointing out specific details in a screenshot.
Positioning and Wrapping Your Drawing
Once you click Save and Close, your drawing lands inside your document body. Getting it to sit right next to your text requires adjusting its image options.
Click on your drawing to reveal a small formatting menu underneath it. You'll see three primary text wrapping choices:
- In line: The drawing treats text like a character in a sentence. It sits on the text baseline, which often creates awkward vertical gaps.
- Wrap text: Text flows naturally around the edges of your drawing. This works best when you want illustrations embedded neatly alongside paragraphs.
- Break text: The drawing forces text above and below it, leaving the sides completely blank. This is ideal for large flowcharts or wide diagrams that span the full width of the page.
You can also use the size and rotation handles on the corners of the drawing to scale it up or down. Holding the Shift key while dragging corners maintains the original aspect ratio so your shapes don't distort.
Common Mistakes to Avoid
Working with graphics inside a word processor comes with a few common pitfalls. Keep these tips in mind to save yourself frustration:
- Forgetting to save: If you close the drawing window using the top-right "X" instead of clicking Save and Close, your recent changes might not transfer over to the document. Always hit save first.
- Making text too small: Drawings scale down when placed in documents. If your flowchart text is set to 8pt inside the canvas, it will be nearly unreadable on standard screens. Stick to 12pt or higher.
- Overcrowding the canvas: Give your elements room to breathe. Cramming too many shapes into a single drawing window makes your diagram cluttered and hard to follow. Break complex ideas across multiple smaller drawings if necessary.
For more detailed tutorials on document formatting and workspace collaboration, check out the official Google Workspace Learning Center.
Frequently Asked Questions
Can multiple people edit the same drawing at the same time?
No. Unlike the main document body, multiple users cannot simultaneously edit inside the exact same drawing canvas. One person must open, edit, and save the drawing before another collaborator can open it for changes.
Can I import external images into the drawing canvas?
Yes. You can click the image icon inside the drawing toolbar to upload pictures from your computer, search the web, insert URLs, or grab files from your Google Drive. Once imported, you can add shapes, arrows, or text notes directly on top of those images.
How do I transparently layer shapes on top of each other?
Right-click any shape inside the drawing window, hover over Order, and choose options like Bring to front or Send to back. This controls how overlapping elements interact visually. You can also adjust color transparency using the custom color picker in the fill menu.
What is the best way to export just the drawing without the rest of the document?
If you need to use your diagram elsewhere, you can open the drawing tool, create your graphic, and download it directly. Go to File inside the drawing window, select Download, and choose your preferred format like PNG, JPEG, or SVG.



