Implementing Apple login integration is a mandatory requirement if your mobile application uses third-party social logins like Google or Facebook and runs on the App Store. Beyond compliance, offering a secure, privacy-focused authentication method reduces friction, speeds up onboarding, and eliminates the burden of handling passwords on your own servers. This guide walks you through the exact technical architecture, code flow, configuration steps, and hidden edge cases you need to master for both native apps and cross-platform web implementations.
At its core, Sign in with Apple relies on OpenID Connect and OAuth 2.0 standards, wrapped in cryptographic layers that protect user data. When a user taps the sign-in button, Apple issues a JSON Web Token (JWT) containing a unique user identifier, a verified email address (which can be hidden via the private email relay service), and cryptographically signed proof of authenticity. Your backend server must receive this token, verify its signature against Apple's public keys, and establish an authenticated session for the user without ever storing a plaintext password.
Configuring Your Apple Developer Environment
Before writing any code, you must configure your identifiers, certificates, and capabilities inside the Apple Developer Account. Skipping or misconfiguring any part of this setup will cause silent authentication failures and invalid client errors during testing.
- Enable the App ID Capability: Open your developer account portal, navigate to Certificates, Identifiers & Profiles, and select your App ID. Check the box for the Sign in with Apple capability. If you are building a native iOS, macOS, watchOS, or tvOS app, you must also enable this capability directly within your target settings under Signing & Capabilities in Xcode.
- Create a Services ID for Web Support: If your application operates on the web, Android, or cross-platform environments, you need a distinct Services ID. Register this ID, associate it with your primary App ID, and configure your authorized domains and return URLs. Ensure that every redirect URI matches your absolute server endpoints precisely, including the HTTPS scheme.
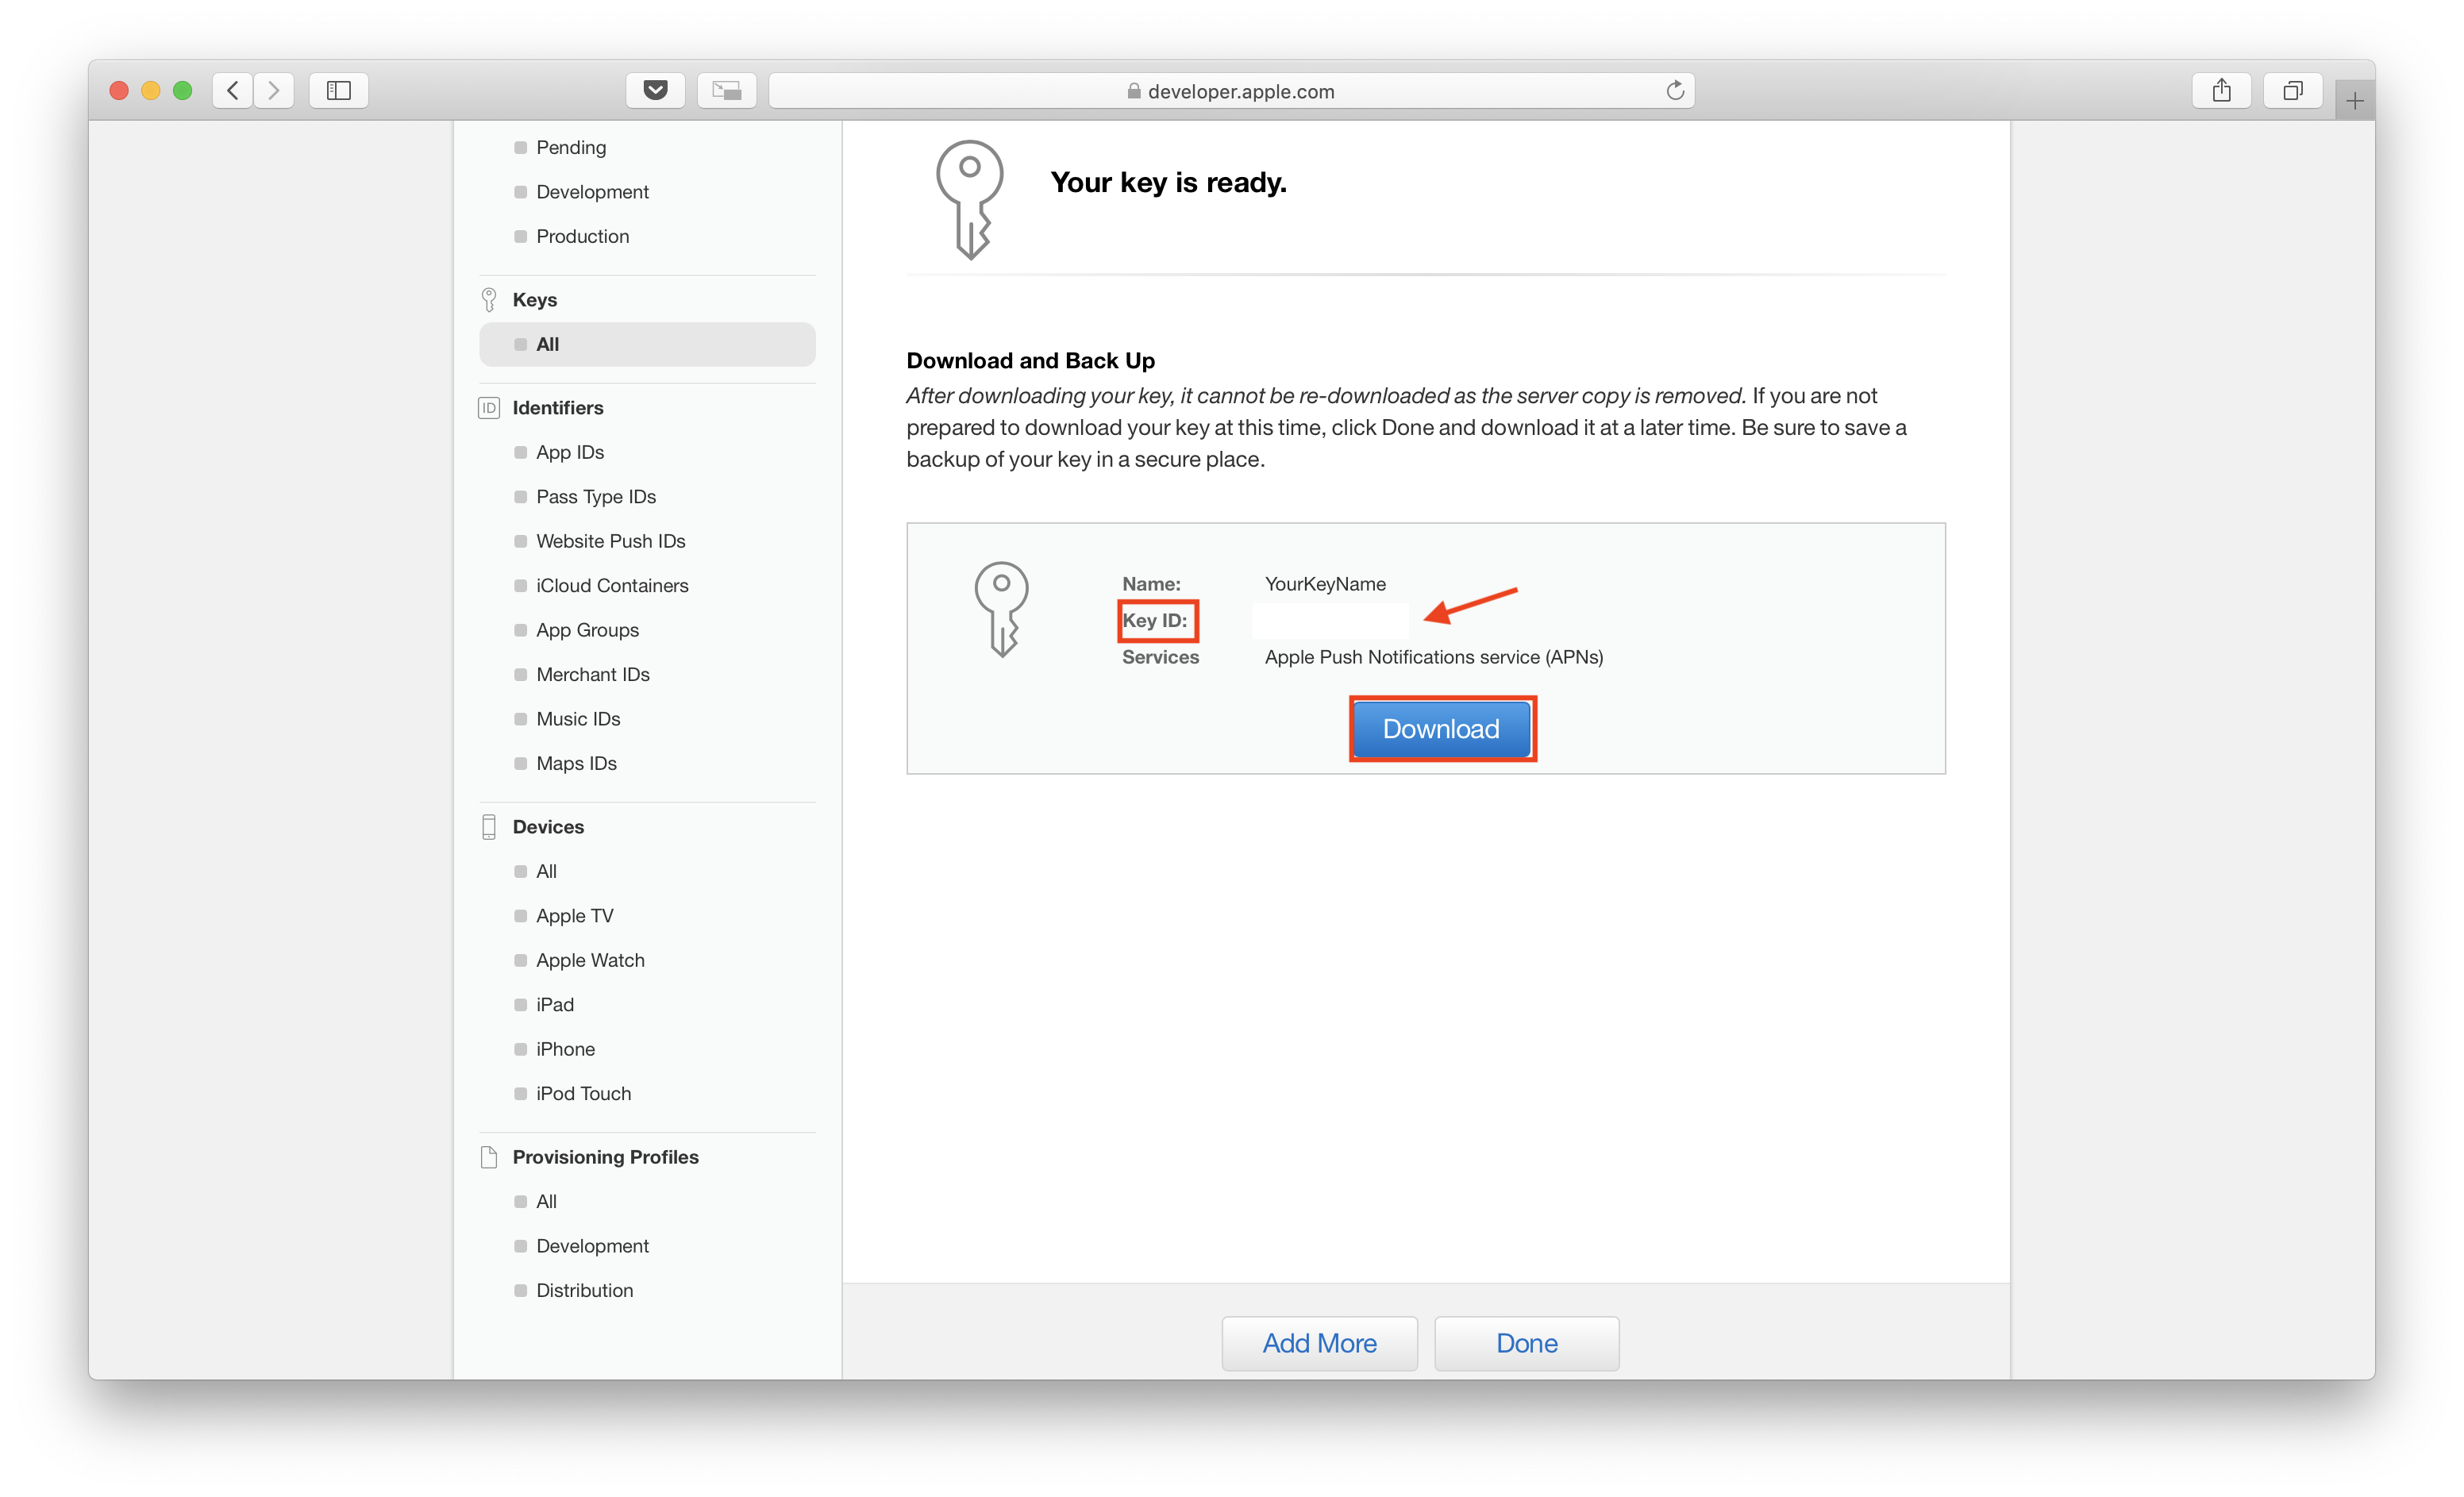
- Generate a Private Key: Navigate to the keys section and generate a new Sign in with Apple private key (
.p8). Download the key file immediately, as Apple only allows you to download it once. Note your Key ID and Team ID, as your backend will use these credentials to generate client secrets for token validation. - Register Notification Endpoints: Set up a server-to-server notification URL to handle account deletions, email forwarding preference changes, and permanent Apple ID closures. Apple requires this endpoint to maintain accurate account sync states on your backend.
Implementing Native iOS Authentication
For native applications, Apple provides the AuthenticationServices framework. This framework handles the secure system UI sheet, biometric validation via Face ID or Touch ID, and credential generation out of the box.
import AuthenticationServices

func handleAuthorizationButtonPress() {
    let provider = ASAuthorizationAppleIDProvider()
    let request = provider.createRequest()
    request.requestedScopes = [.fullName, .email]

    let controller = ASAuthorizationController(authorizationRequests: [request])
    controller.delegate = self
    controller.presentationContextProvider = self
    controller.performRequests()
}
To capture the response on your view controller, conform to ASAuthorizationControllerDelegate. When the authorization succeeds, inspect the returned credential object.
extension LoginViewController: ASAuthorizationControllerDelegate {
    func authorizationController(controller: ASAuthorizationController, didCompleteWithAuthorization authorization: ASAuthorization) {
        if let appleIDCredential = authorization.credential as? ASAuthorizationAppleIDCredential {
            let userIdentifier = appleIDCredential.user
            let fullName = appleIDCredential.fullName
            let email = appleIDCredential.email

            if let identityTokenData = appleIDCredential.identityToken,
               let identityTokenString = String(data: identityTokenData, encoding: .utf8) {
                // Send identityTokenString and userIdentifier to your backend server for verification
                sendTokenToServer(token: identityTokenString, userId: userIdentifier, email: email, name: fullName)
            }
        }
    }

    func authorizationController(controller: ASAuthorizationController, didCompleteWithError error: Error) {
        print("Sign in with Apple failed: \\(error.localizedDescription)")
    }
}
The identityToken is a signed JWT. Never trust user data passed alongside the token without validating the JWT cryptographic signature on your server first.
Handling Web and Cross-Platform Integration
For web applications, progressive web apps, or Android wrappers, you cannot use native Swift frameworks. Instead, you load the official JavaScript SDK (appleid.auth.js) and initialize the client configuration dynamically.
AppleID.auth.init({
    clientId : 'com.yourdomain.serviceid',
    scope : 'name email',
    redirectURI: 'https://yourdomain.com/auth/apple/callback',
    state : 'developer_generated_csrf_state',
    usePopup : true
});

document.getElementById('apple-signin-button').addEventListener('click', async () => {
    try {
        const data = await AppleID.auth.signIn();
        // Handle successful response containing the authorization code and identity token
        verifyTokenWithBackend(data.authorization);
    } catch (error) {
        console.error('Apple sign-in error', error);
    }
});
When using popups or redirects, Apple returns an authorization response containing a single-use code and an id_token. Your backend must exchange the authorization code for a refresh token and access token by communicating directly with Apple's REST API endpoint at [https://appleid.apple.com/auth/token](https://appleid.apple.com/auth/token).
Backend Token Verification and Security
Your server must perform rigorous validation checks before creating a local session for the user.
- Fetch Apple Public Keys: Retrieve Apple's current JSON Web Key Set (JWKS) from
[https://appleid.apple.com/auth/keys](https://appleid.apple.com/auth/keys). Cache these keys securely to avoid rate-limiting issues, but ensure you refresh them periodically. - Validate the JWT: Verify the signature of the
id_tokenusing the appropriate public key. Check that the issuer (iss) matches[https://appleid.apple.com](https://appleid.apple.com), the audience (aud) matches your App ID or Services ID, and the expiration time (exp) has not passed. - Generate a Client Secret: For server-to-server validation and token refreshes, you must sign a JWT yourself using your private
.p8key, Team ID, Key ID, and Client ID. This signed JWT acts as your client secret and expires after a maximum of six months.
Common Developer Mistakes to Avoid
Even experienced engineers frequently stumble over subtle edge cases during integration. Keep these pitfalls in mind to save hours of debugging:
- Failing to save user data on first login: Apple only sends the user's full name and email address on the very first authorization request. If your backend fails to capture and store these fields immediately, you will never see them again for that user unless they revoke access in their Apple ID settings and re-authenticate.
- Mismatched Redirect URIs: If your web redirect URL has a trailing slash in the developer portal code configuration but lacks it in your JavaScript payload, Apple returns a cryptic
invalid_clienterror. - Ignoring Credential Revocation: Users can disconnect your app from their Apple ID at any time. If you do not listen to server-to-server notifications, your database will hold stale authorization tokens for accounts that are no longer valid.
- Assuming Email Uniqueness: Users can choose to hide their email address via Apple's private relay service. These emails follow the format
string@privaterelay.appleid.com. Never enforce standard email validation rules that reject subdomains or uncommon domain endings.
Frequently Asked Questions
What happens if a user chooses to hide their real email address?
Apple generates a unique, randomized proxy email address for that specific app (e.g., xyz123@privaterelay.appleid.com). Any message sent to this address by your mail server is automatically forwarded by Apple to the user's real personal inbox. You must treat this proxy address as the primary account email and avoid asking the user for their real email address.
How do I test Sign in with Apple without an iOS device?
You can test web integrations on any browser using Apple Developer Documentation guidelines via the JavaScript SDK. For native development, you must use an Apple device or the Xcode iOS Simulator signed into a valid iCloud account.
Can a user link an existing password-based account to Apple login?
Yes. You should build an account-linking feature into your app's settings. Allow an already logged-in user to tap a button to associate their Apple ID with their existing user record, matching them via verified email credentials.
Why am I getting an invalid_grant error when exchanging the authorization code?
Authorization codes issued by Apple are strictly single-use and expire within five minutes. If your server attempts to exchange the same code twice, or if too much time passes between user consent and backend processing, Apple rejects the request with an invalid grant error.


